


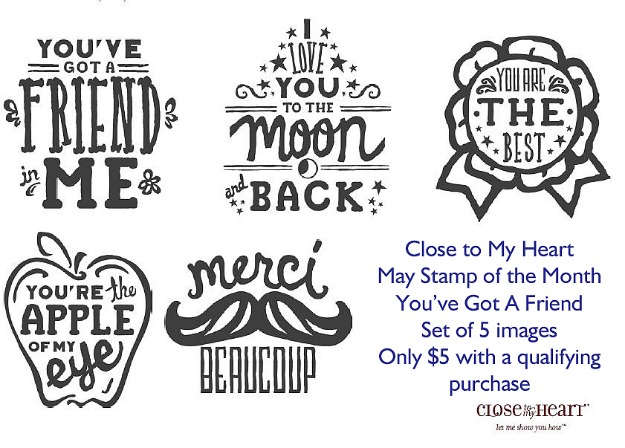
May 2014: You’ve Got a Friend

Beautiful Stamps, Amazing Discounts
Each month you can purchase a new D-size stamp set, available for one month only, for just
$5
— that’s over 70% off retail! When you place an order of
$50
or more in Close To My Heart products, you qualify for this special Stamp of the Month pricing.
Incredibly Cool Crafts
In love with the artwork we created with this stamp set? Get ready to
make it yourself! Purchase the materials listed here along with your
deeply discounted Stamp of the Month set to get started!
Materials Needed
- My Acrylix™ You’ve Got a Friend
- Ariana Paper Packet
- Black & Grey Epoxy Bubbles
- Topiary Mini Chevron Ribbon
- Ruby Chevron Washi Tape
- Dot Embossing Folder
- Chevron Embossing Folder
- White Daisy Circle Spin Cards & Envelopes
Required Tools
- Crystal Blue Cardstock
- Crème Brulee Cardstock
- Ruby Cardstock
- Outdoor Denim Cardstock
- White Daisy Cardstock
- Ruby Exclusive Inks™ Pad
- Black Exclusive Inks™ Pad
- Crystal Blue Exclusive Inks™ Pad
- Color-Ready Midtown Cork Shapes
- Keyboard Kraft Alphabet
- EK Tools™ Journaling Pen
- Corner Rounder
- Cricut® Artiste Collection
- Thread
- Toothpicks
5" × 7" You Are the Best Friend Card

Helpful Hints
To create the techniques featured in this artwork, follow the helpful hints outlined below.- Cut the following Cricut® Artiste shape using paper of choice:
- 1" Shift+Card
(p. 55)
- 1" Shift+Card
- Dry emboss dots with dot embossing folder on White Daisy circle spin card base.
- Adhere rosette on circle spin shape in window; top with stamped ribbon sentiment.
- Color 3 Color-Ready Midtown cork chevrons with black ink, place them on left side of card, and top with cork arrow.
- Layer pennants trimmed from Ariana B&T Duos™ paper on larger cork pennant.
8" × 3 1/2" You’ve Got a Friend Card

Helpful Hints
To create the techniques featured in this artwork, follow the helpful hints outlined below. Then use the pattern found on page 57 (Wishes: Lower Layers™) of our Wishes Card Confidence Program™ how-to publication for inspiration.
- Trace dashed line around Color-Ready Midtown cork pennant with EK Tools™ journaling pen; color cork star and chevrons with black ink.
- Dry emboss dots with the Dot embossing folder on Crystal Blue cardstock strip.
- Stamp “You’ve Got a Friend in Me” sentiment in black and Ruby inks on White Daisy cardstock; trim “Friend” from Ruby sentiment and layer it over black sentiment using 3-D foam tape.
- Trim out sentiment, round corners, and trace around edges.
7" × 5" Apple of My Eye Card

Helpful Hints
To create the techniques featured in this artwork, follow the helpful hints outlined below.
- Cut the following Cricut® Artiste shape using paper of choice:
- 2 1/4" Shift+Accent 3
(cut 2, p. 46)
- 2 1/4" Shift+Accent 3
- Stamp two apple images on Cranberry cardstock, Ariana Green Hexagon B&T Duos™ paper, and Sorbet cardstock; trim and piece together two complete apples.
- Mount each apple on one die-cut button, using 3-D foam tape as desired.
- Adhere buttons on either side of White Daisy circle spin card circles.
- Remove black string from black metallic baker’s twine; use black string to stitch border around window opening in card, if desired.
- Embellish card as shown.
4 1/4" × 5 1/2" Merci Beaucoup Card

Helpful Hints
To create the techniques featured in this artwork, follow the helpful hints outlined below. Then use the pattern found on page 43 of our Make It from Your Heart™ Volume 2 how-to publication for inspiration.
- Cut the following Cricut® Artiste shape using paper of choice:
- 2" Accent 2 (p. 65)
- Dry emboss Crème Brulee cardstock strip with dot embossing folder.
- Wrap Ruby chevron washi tape around two toothpicks; trim into pennants.
- Tie toothpicks together using Topiary mini chevron ribbon and affix on left side of card.
- Stamp moustache sentiment on speech bubble and on black cardstock using black ink; trim moustache from black cardstock and layer over image on speech bubble using 3-D foam tape, if desired.
- Sponge Color-Ready Midtown cork chevrons with black ink; mount as shown.
4 3/4" × 3" You Are the Best Card

Helpful Hints
To create the techniques featured in this artwork, follow the helpful hints outlined below. Then use the pattern found on page 109 (Wishes: Noteworthy™) of our Wishes Card Confidence Program™ how-to publication for inspiration.
- Dry emboss chevron pattern using the chevron embossing folder on Crystal Blue cardstock strip.
- Stamp ribbon sentiment in black ink on cardstock and patterned paper; trim.
- Attach center from cardstock on Ariana Coral Dots B&T paper base image using 3-D foam tape if desired.
7" × 5" I Love You to the Moon Card

Helpful Hints
To create the techniques featured in this artwork, follow the helpful hints outlined below.
- Cut the following Cricut® Artiste shape using paper of choice:
- 2 1/4" Shift+Accent 3
(cut 2, p. 46)
- 2 1/4" Shift+Accent 3
- Trim 2 copies of photos into circles and place each on die-cut button using 3-D foam tape, if desired.
- Adhere a die-cut button on either side of circle spin shape in card window.
- Dry emboss chevrons with chevron embossing folder on Sweet Leaf cardstock square; use square to back card window.
- Wrap Topiary mini chevron ribbon around bottom half of cork frame; knot on right side.
- Frame window with both Crystal Blue cardstock frame and Color-Ready Midtown cork frame.
- Sponge left edge of stamped “I Love You to the Moon and Back” sentiment circle in black ink.

No comments:
Post a Comment
Tell me what you think.