Thursday, April 5, 2012

Happy Easter Snow Bunny!

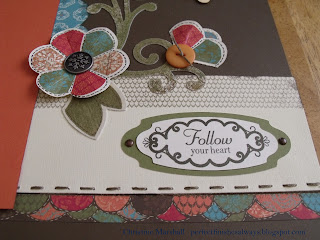
So I spent the morning crafting and completed my version of the 2012 CTMH Idea Book cover.

I changed up the sentiment as I discovered this morning how easy the Cricut machine and our wonderful Art Philosophy cartridge is to use. I have had a Cricut for many years but haven't really used it. Now I am in love!!!


Many of our clear MyAcrylix stamps fit perfectly into the shapes that can be cut. This cartridge contains over 700 images. Can you tell what I'm going to be playing with for the next few weeks, maybe months?

After a morning of fun crafting, my daughter, Robyn and I had to stretch our legs. Look at the fruits of our spring storm labour.


Happy Easter Everyone!!!

Westlock, Alberta Snow Day

For once, the weatherman was right on the money with this early spring storm forecast. Currently, the highways north of Edmonton are in horrific shape and my employer has declared a Snow Day!

Here's a peek outside my front door. Yesterday, I could see my front lawn and I was planning my new flower bed placement. This morning I see potential snowman space!


Yesterday, my back yard was completely free of snow and visions of vegetable garden improvements were dancing in my head. This morning you can't tell there is a plot beside the garage.


My handrail is my snow gauge. It is 1 1/2 inches high and as you can see the snow is at least twice the height as the wood so we are at approximately 3 inches of accumulation.


Currently, the snow is continuing at a steady rate with very large wet and fluffy flakes! I believe we will get the 6 to 10 inches that was forecast last night.


Wednesday, April 4, 2012

Monday, April 2, 2012

National Scrapbooking Month

April is National Scrapbooking Month and we have a fantastic paper packet just for you!!

Take a peek at this package:


Dotty for You includes 24 specially designed, coordinating B&T Duos® sheets (2 each of 12 patterns) and an artwork idea insert to get your creative juices flowing. 

When you place an order of $35 or more in products from the Spring/Summer 2012 Idea Book between April 17 and May 31, you may add the Dotty for You paper packet, valued at $19.95, for just $5. 

But that’s not all! There are two ways you can get this darling paper packet FREE!

Hostesses will receive a free Dotty for You paper packet when their Gathering sales total $400 or more (excluding tax, shipping/handling, and Operation Smile donations).

New Consultants who sign up between April 1 and May 31 (two full months!) will receive a free Dotty for You paper packet with their kit.

Sunday, April 1, 2012

Gift Card Holder Instructions

OK, well I didn't get 5 comments however I want to share these instructions with you anyways!

1. Cut 1 piece of transparency at 4 1/4" x 10 1/2". This is the viewing window.
2. Cut 2 pieces of card stock at 2" x 5". These are your base and cover.
3. Score the transparency at 1/2", 1 1/2", 5 1/2" and 6 1/2" as shown below.

4. Score both card stock pieces at 1/2" on all four sides. Cut in on the scoreline to the intersecting score line to create flaps. Snip out small wedges to make assembly easier.

5. Use a piece of sticky tape along the small edge of the transparency and attache to the long edge. Viewing window is now assembled.

 6. Make a slit in the center of the base the length of your gift card. I used my scoring board to make the cut with a finger knife to ensure the slit was centered.

7. Assemble base and cover by gluing the flaps in.

8. Run adhesive around the sides of the base. Insert into the bottom of the viewing window and press edges to make sure the base is secure to the window.
9. Slide the gift card up from the bottom through the slit. You may have to fiddle around a bit to make it stand the way you want it to. The slit is tight and will hold the card securely.

10. Squeeze the top edges in and place the cover on top. I didn't add extra length or width to the top as the transparency pushes gently holding the top on without having to secure it with anything else. It's a snug fit to ensure the cover stays on.

You are now ready to put the finishing touches on. In my sample I added wide scalloped lace around the edge of the cover. Then I ran a length of ribbon over the lace and added a bow. I finished it off by making a tag and attaching it with some hemp and a safety pin.

Happy Paper Crafting!!!